Measuring rounds of angles
To start the network measurement:
-
Open a project and work order that contains your existing control points and connect the controller to an instrument.
Optionally, you can perform an instrument setup before starting the network measurement. This enables you, during the configuration of the network measurement, to check the point locations to verify if the prisms were set up over the correct control point.
-
Tap Home / Project Setup / Total Station Setup and select Measure Control Network. Tap Accept.
-
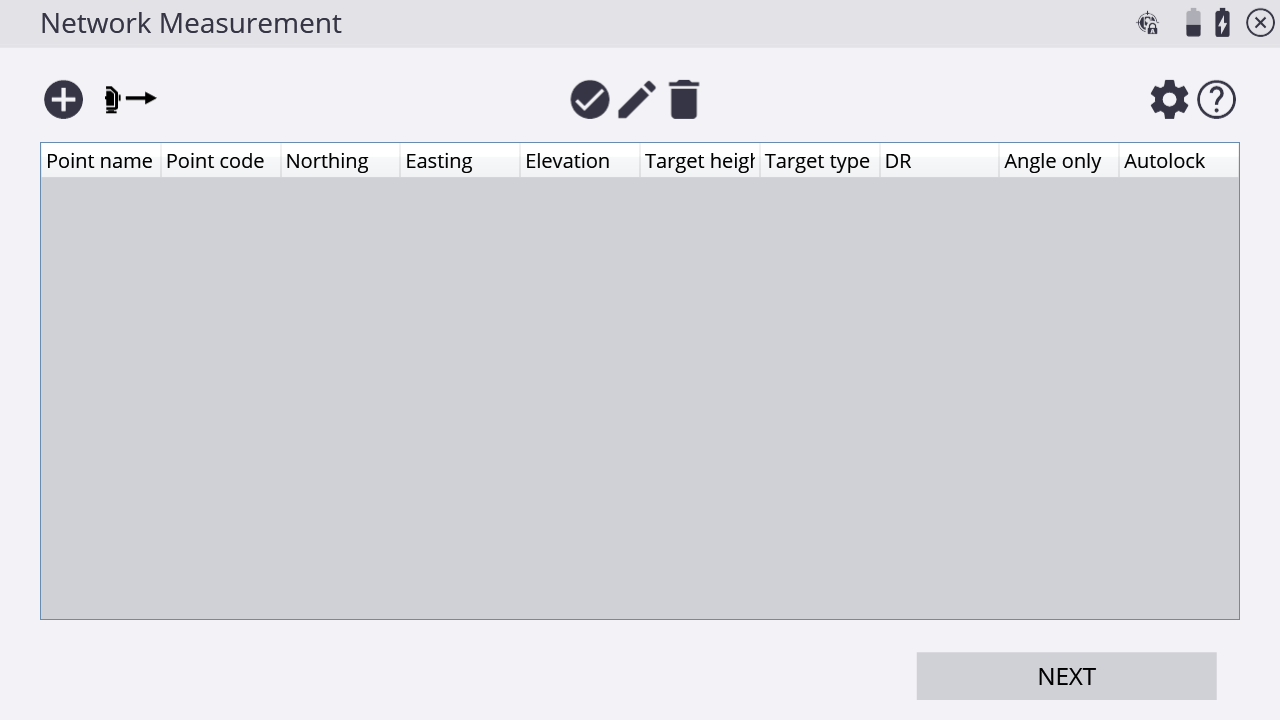
Use the following screen to configure the measurements for a control point:
-
The Network Measurement screen contains the following buttons:
Tap this button…
to…

add a new point to the list.

measure and add a foresight point to the list.

check a point location.

edit point information.

delete a point from the list.

edit the settings for network measurement.
-
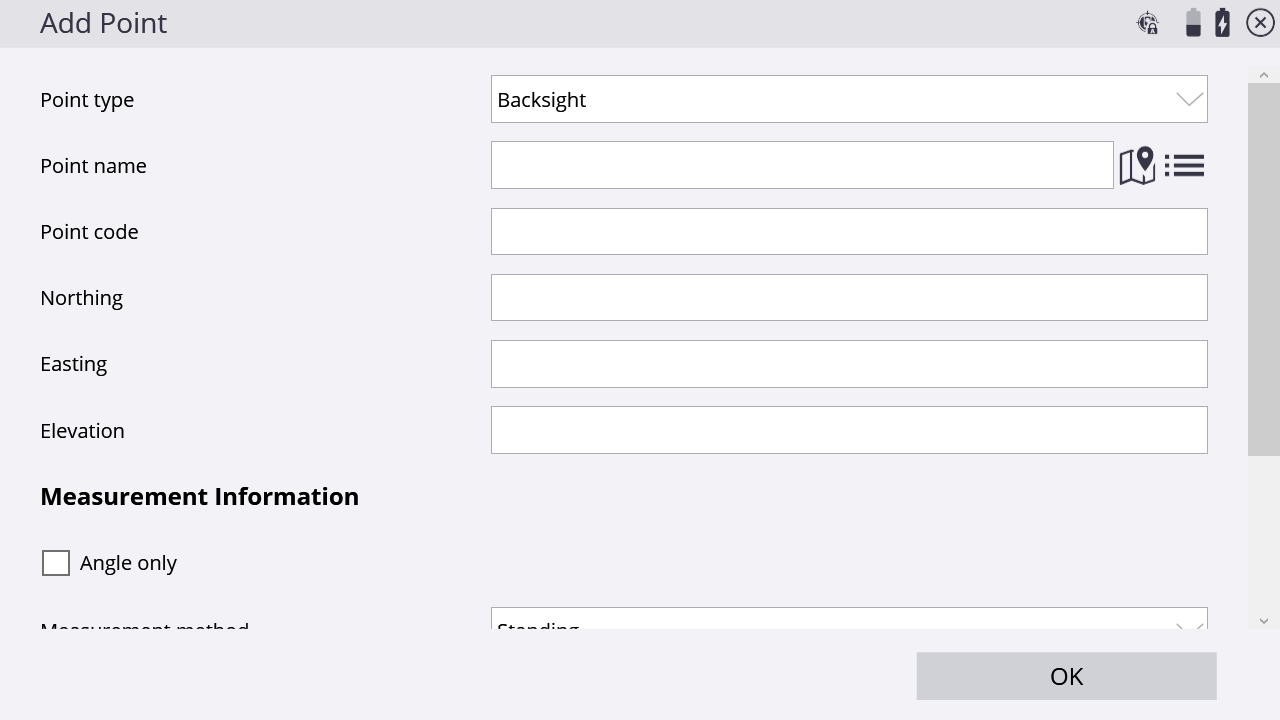
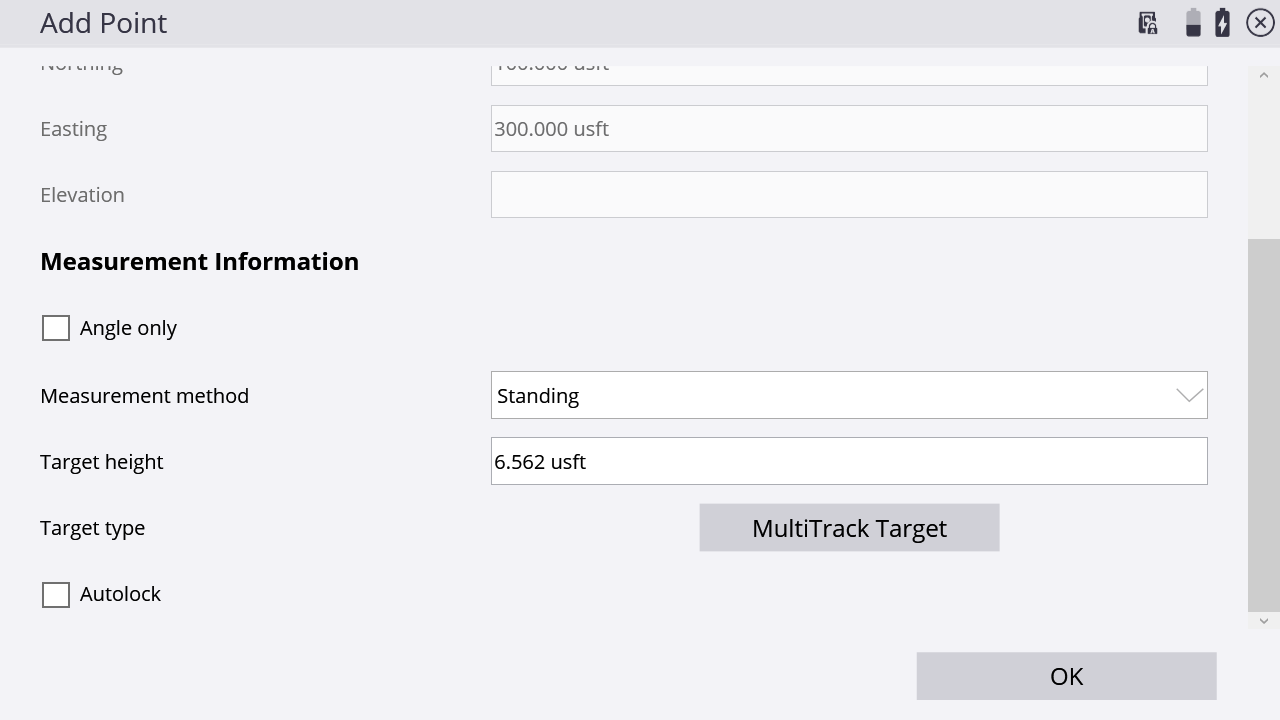
To add an instrument point followed by all the backsight points for your setup,
tap.If the control point is not included in the Control Point file yet, then enter the coordinates in the following screen:
-
In the Measurement Information group, you can decide if an individual control point should only be measured reflectorlessly or angle only, and can enter the correct target height, target type, and target ID.
-
When selecting the Autolock option, the instrument will automatically lock on the prism after the first set. If you leave this option cleared, you will manually need to aim the total station at the prism each time.
TIP – When adding the next point, tap Use Last Settings to copy the settings from the previous point so that you do not have to re-enter all the values.
-
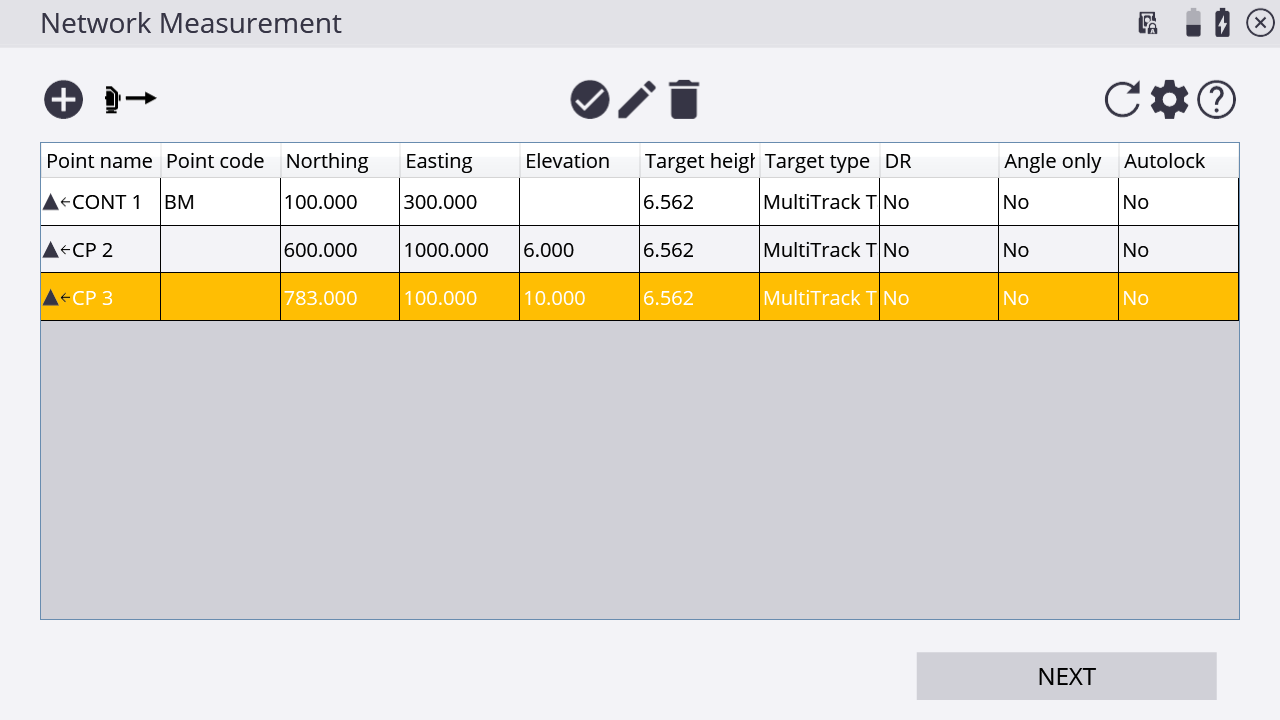
To add and measure new control points as foresight points, tap
. To configure the point, see Step 4 through Step 5. -
If required, tap
to check the point location of an individual point from the list and verify that the prism is set up over the correct point. -
Tap
to edit the configuration of each point or tap to delete it from the list completely. -
Once the configuration is correct, tap Next:
-
Tap
to configure the face and round order as follows:Tap…
to set…
F1
all targets only in face 1.
F1 F2
all targets only in face 1 first and then swaps in face 2 and measure all targets again.
F1/F2
each target in face 1 and then face 2 before going to the next target.
123...123...
all targets in face 1 from left to right then swap in face 2 and measure from left to right.
123...321...
all targets in face 1 from left to right then swap in face 2 and measure from right to left.
-
To calculate the standard deviation for each target, measure at least two rounds.
-
Tap Next and then tap Next again to access the Measurement screen. The Siteworks software prompts you to aim at the different targets and measure the first set. To measure the remaining sets automatically, enable Autolock.
-
While measuring the second set, the software indicates the differences between face 1 and face 2. If the measurements are within the tolerances that were entered for the differences between face 1 and face 2, the software shows the status “PASS” for that point.
-
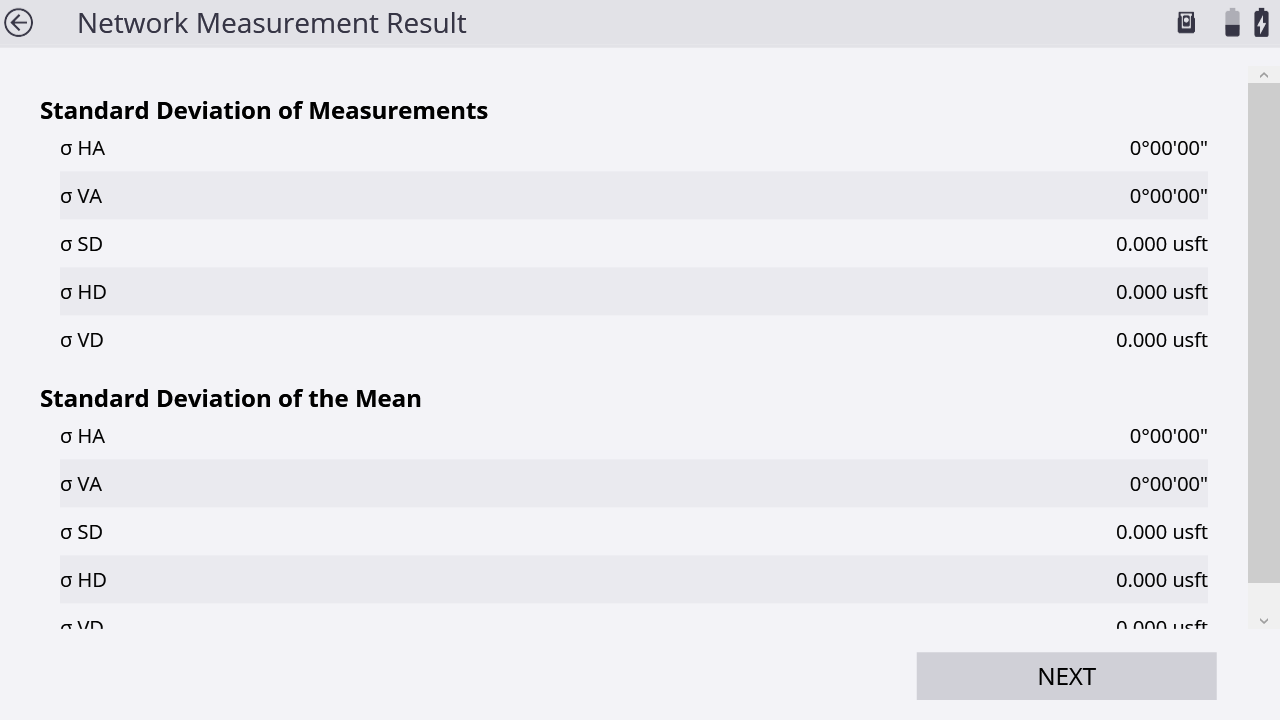
When all the rounds are measured, the software shows the Standard Deviation of Measurements, which is an indication for the accuracy of all of the measurements. The Standard Deviation of the Mean gives an estimate of the precision of the measurement.
-
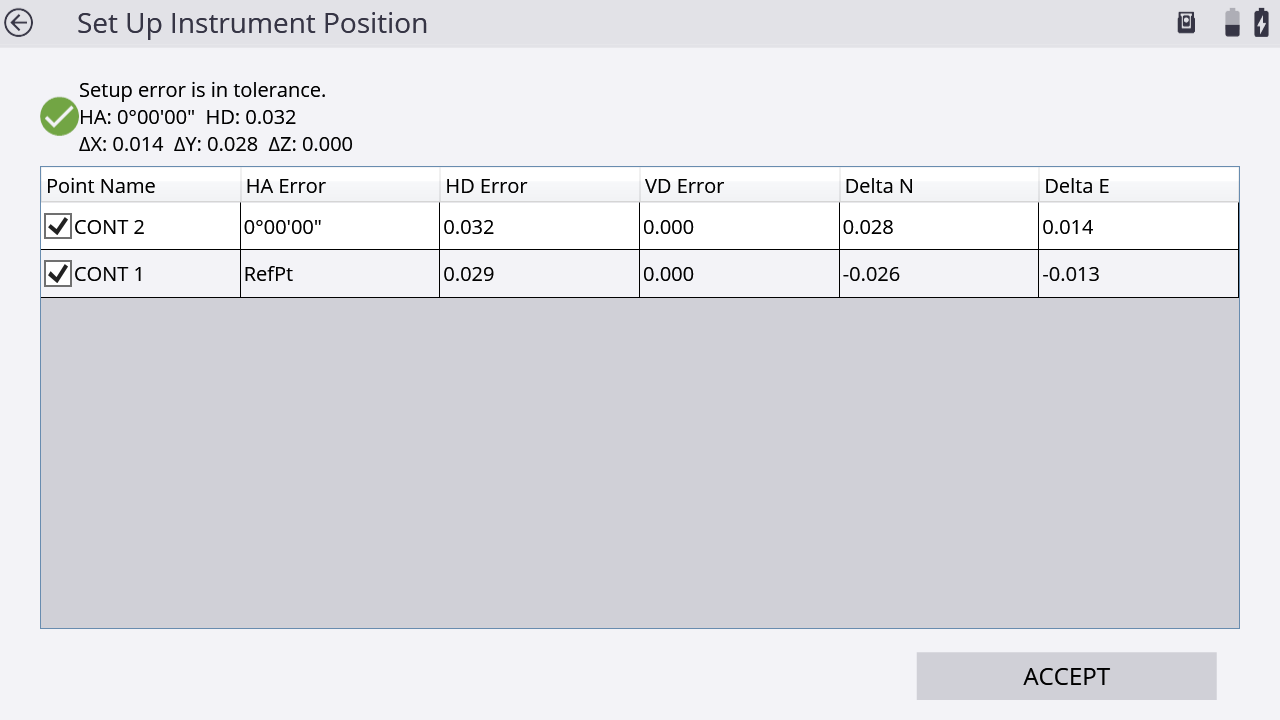
The next screen shows the differences between the measured rounds for each target:
-
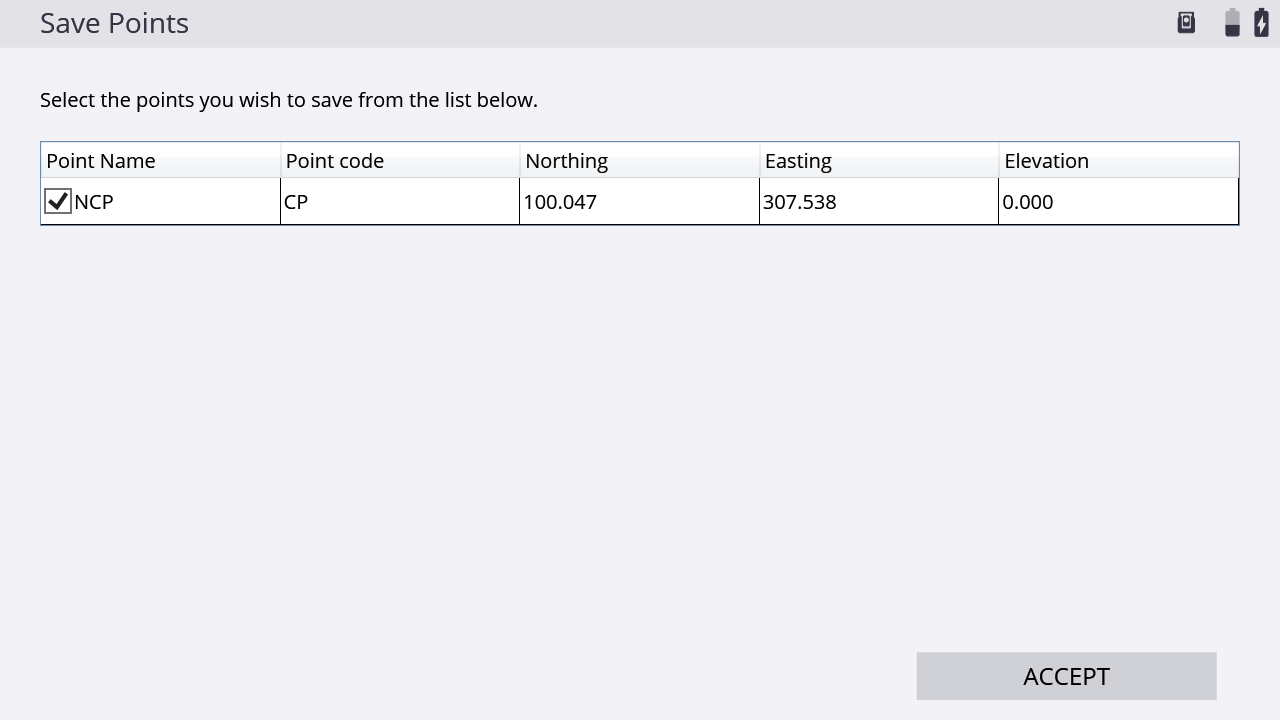
The next screen allows you to select which control points should be stored in the Control Point file of the site. The coordinates are a result of the average angle and distance measurements on one control point, but they do not take a traverse or network adjustment in account:
-
Once all measurements and all control points are measured, you can export the RAW data of the measurements for doing a network adjustment. Select the Home menu / Data Management / Export Measured Data. To adjust the network in the Trimble Business Center software, export the data with the Network Measurement (DC) option. An export for StarNet network adjustment software is also available. Use the Network measurement (XSLT). The files with the raw data are stored in the Output folder of the current work order.
